How to create a component library with React Native for Web
January 05, 2022
Creating a component library from scratch is an exciting endeavor. It's more straightforward if you use web-only technologies such as React, Web Components, or Svelte. It becomes a tad challenging if I decided to give it a go-to React Native for Web.
React Native for Web is a relatively young technology that powers Twitter web clients. It has React Native primitives translated into DOM elements. I find it cleaner and more concise to use View instead of <div>. The latter is a random abbreviation that is created way before Javascript and interactive websites.
Without further ado, let's kick it off!
Scaffold the project
Create a file using zsh (which is the default on MacOS):
take component-libraryOr when using bash
mkdir component-library && cd component-libraryI will be using yarn to create the project. Feel free to use npm.
yarn init -yFirst, install Typescript:
yarn add -D typescriptCreate an entry point.
mkdir src && touch src/index.tsThen add the following:
yarn add react react-dom react-native-webI will be using parcel to bundle the app. I am not going to go into the details of bundling. You can find a quick introduction if you are looking for further resources at the end of the article.
yarn add -D parcelInitialize git
git init
echo "/node_modules" >> .gitignore
git add .
git commit -m "Initial commit"
I must add types since I use typescript. These dependencies have to be devDependencies.
yarn add -D @types/react @types/react-nativeI must create tsconfig for React project
npx tsconfig.jsonLet's create our first component
// src/Header.tsx
import React from "react";
import { View, Text, StyleSheet } from "react-native";

const styles = StyleSheet.create({
  header: {
    paddingTop: 50,
    backgroundColor: "blue",
  },
  headerText: {
    fontSize: 22,
    color: "white",
    fontWeight: "bold",
    paddingHorizontal: 10,
  },
});

interface HeaderProps {
  backgroundColor?: string;
}

export const Header: React.FC<HeaderProps> = ({
  backgroundColor = "purple",
}) => {
  return (
    <View style={[styles.header, { backgroundColor }]}>
      <Text style={styles.headerText}>I am the first component</Text>
    </View>
  );
};
Don't forget to update index.ts too.
// src/index.ts
import { Header } from './Header';

export {
	Header
}
Parcel Setup
Build paths have to be added.
- source: entry point of the project
- main: generated output for JS bundle
- module: ESModule target
"source": "src/index.ts",
"main": "dist/main.js",
"module": "dist/module.js",
"types": "dist/types.d.ts"
After that, add the following scripts to your package.json file
"scripts": {
	"build": "parcel build"
},
That's fine. We have a solid Parcel setup for now. We're not able to test it though. We'll do it with Storybook
Storybook
npx sb initIt will take some time to add storybook
Storybook doesn't have any idea about react-native-web so we have to instruct it strictly.
// .storybook/webpack.config.js
module.exports = async ({ config }) => {
  config.resolve.alias = {
    "react-native$": "react-native-web",
  };

  return config;
};
Storybook adds bunch of files and code. We shall remove most of them to free up space and remove the noise. Remove all the files under src/stories but src/stories/assets and introduction.stories.mdx.
Create Header.stories.tsx and add the content below:
import React from "react";
import { ComponentMeta } from "@storybook/react";

import { Header } from "./Header";

export default {
  title: "Example/Header",
  component: Header,
} as ComponentMeta<typeof Header>;

export const Default = () => <Header></Header>;
Run
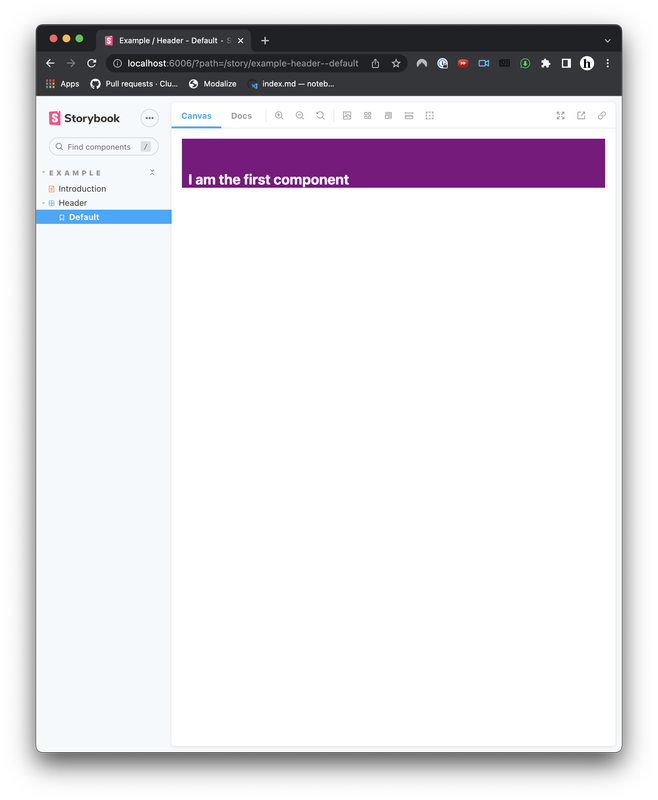
yarn storybookThe end result should be like below
Checkout the working demo on Github
Oguzhan Murat Cakmak, starting his software career in Istanbul and advancing through roles in San Francisco at Uber and Hims&Hers, now does remote work from Kaş, Antalya, balancing his passion for technology with interests in kitesurfing, diving, hiking, and exploring diverse content on podcasts. Follow him on Twitter and Instagram
